


Sections:
Creating a Template
Entering Flight Data
Defining Limits Envelope and Plot
The Totals Tab
The Advanced Tab
Emailing a Report
Template Sharing and Importing
FlightScale for android is brand new and will be evolving fast. I will to my best to try to keep this guide up to date as new features are added, but if you are looking for an explanation of a particular feature that isn’t explained here please send me an email and I will get you the information that you need! Thank you, I sincerely hope you enjoy FlightScale!
When you first launch FlightScale you will see a screen similar to the one shown below. This screen will only have a couple options available on it.
The “About” option will show you some basic application information, such as the version, but also link you this guide.
Creating a Template
The “New Template” button will allow you to create a new general purpose template for you to enter your aircraft!After you tap the “New Template” option, you will be presented with a dialog for you to enter the name of your new template. Enter any name you like, as you can see from the screenshot below, spaces and hyphens are okay in the name. Some other characters, however, are not.
After you create a template, an option to open it will become available on the home screen as shown below. Here, I have created 3 different templates.
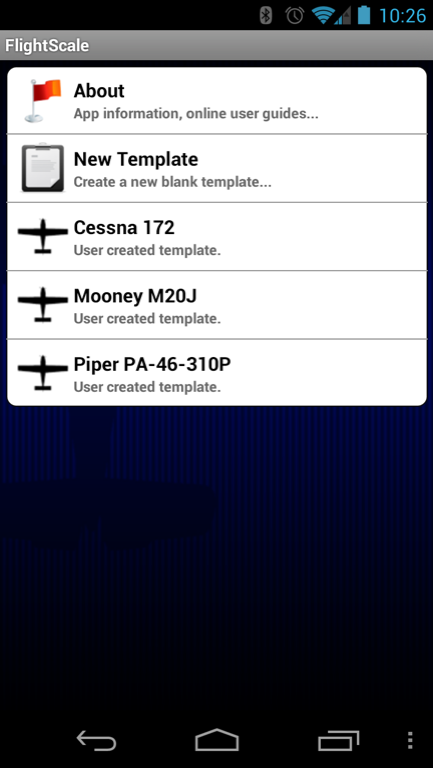
Home screen (v1.0.0)
If you would like to rename a template, or delete it completely, simply “Tap and Hold” on the template entry and you will be presented with more options for that template.
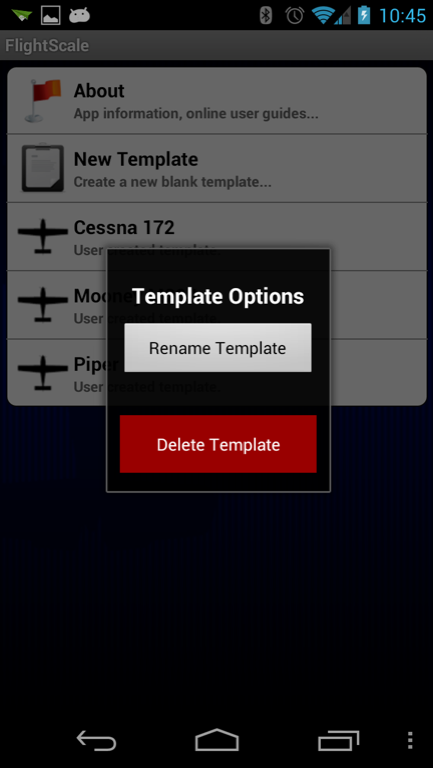
Template options (v1.0.0)
Entering Flight Data
Tapping to open your new template will bring you to the “Entry” screen. You will notice that this template is made of multiple tabs for navigation to different parts. You can either tap on the tab name to jump there, or swipe your screen left or right to flip through the tabs (pretty neat?).
The first tab, the Entry tab, allows you to enter various Weight - Arm - Moment entries for your aircraft. These can include the empty weight of the aircraft, fuel, oil, baggage, passengers, etc.
You only need to enter 2 values in the Weight/Arm/Moment line. You can enter either weight and arm, or weight and moment, or even arm and moment, and the missing field will be calculated for you. You can also enter a description for the entry to help you with organization later.
There is an “Entry Type” spinner control that will allow you to enter fuel and oil to the template. Fuel is a special type of entry because it is a dynamic weight; it can change over the course of your flight (if you set the ramp burn or trip burn fields).
Fuel and oil can be entered as a volume if you wish. Tap on the “Entry Type” spinner control, and you will see options such as “Fuel (by volume)” and “Fuel (by weight)”.
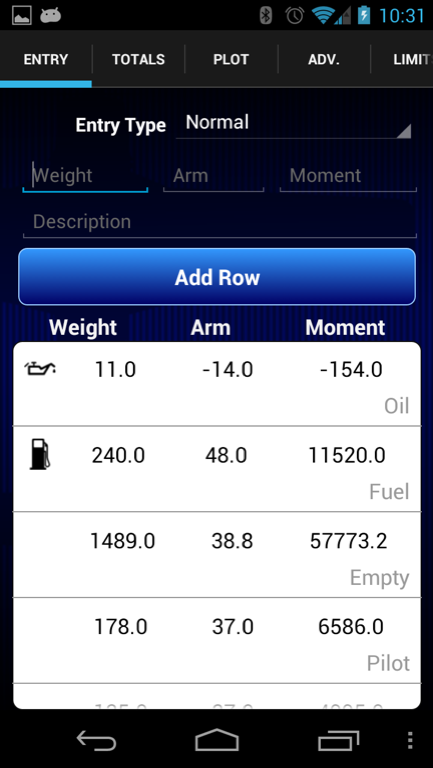
Template entry (v1.0.0)
This entry screen allows you to modify rows that you have already added. It also allows you to move rows up and down in the list, and even delete rows outright. Tap and hold on a row you would like to modify and you will be presented with more options, such as those pictured below.

Template entry options (v1.0.0)
Defining Limits Envelope and Plot
To define your limits you can jump to the “Limits” tab. This is all the way to the right because once you have defined these values you most likely will not be modifying them very much. Simply add your limit values like they appear in your POH. By default this screen expects “Weight / Arm” entries, but under the “Adv.” tab you can set it to expect “Weight / Moment”. Start at the bottom left of the graph on your POH and work your way up and around to the bottom right, as I have done for this Cessna 172 example (leave unused fields 0):
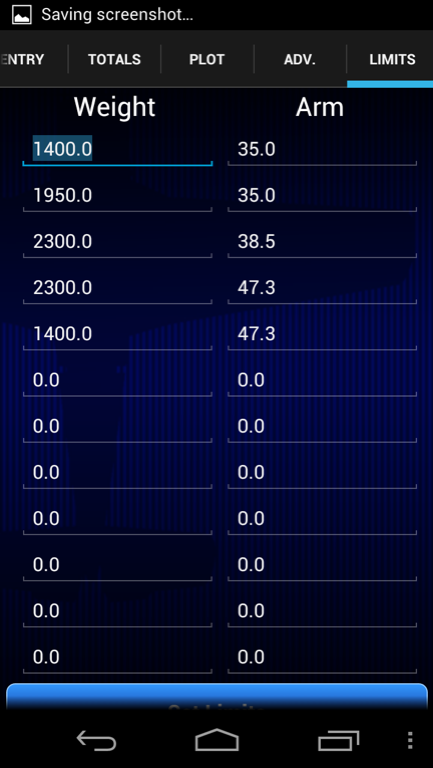
Limits entry (v1.0.0)
With the limits defined, and values entered on the “Entry” tab, I can now look at my live Plot! Below you will see my defined envelope along with some points. The red line depicts a “Max Ramp Weight” which I defined in the Adv. tab.
The points you see represent my Ramp point, Takeoff point, Landing point, and Empty point, based off of the “Trip Burn” and “Ramp Burn” I defined in the “Adv. Tab”. Ramp burn is the amount of fuel that you expect to burn on the ramp performing the run-up, etc. Trip burn is how much fuel you expect to burn on the trip. As you can see, the CG for the aircraft changes quite a bit as fuel is burned.
Notice that the points are color coded Red or Green depending on whether it falls within your envelope or not.
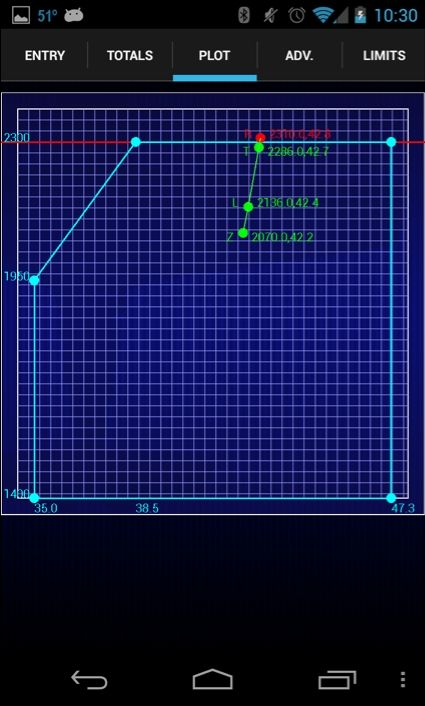
Plot (v1.3.1)
The Totals Tab
For another view of this data, go to the “Totals” tab. This tab lists out your resulting values and color codes them Red or Green depending on if they fall inside of your envelope or not.

Totals (v1.0.0)
The Advanced Tab
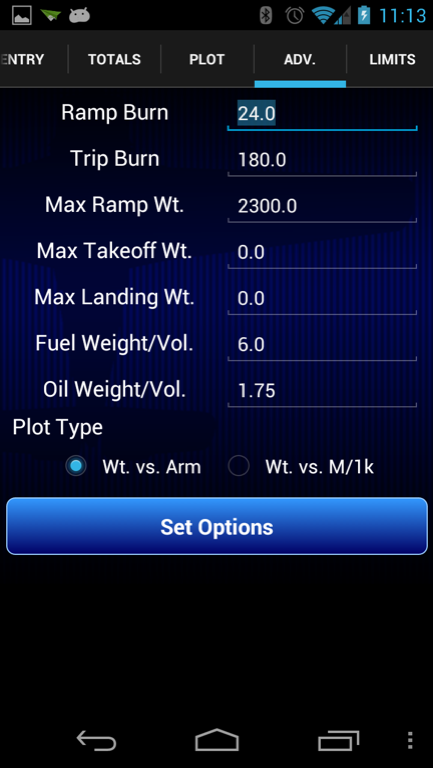
The “Adv.” tab, short for Advanced options, allows you to enter more data for your template. Here, you can define the Ramp Burn and Trip Burn values. You can also define a Max Ramp Weight, Max Takeoff Weight, and Max Landing Weight.
You can also change the “Weight per volume” ration for fuel and oil, if you want to adjust the specific gravity for temperature or fuel type, etc.
There is also an option to change the plot type from Weight vs. Arm to Weight vs. Moment/1000.
Emailing a Report
To email yourself a report of your calculations go to the “Totals” tab. There, you will find a button labeled “Email Report”. Tap this!
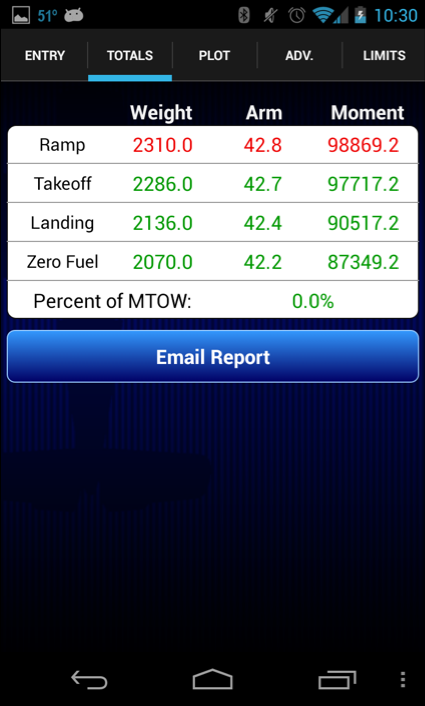
Totals (v1.3.1)
This will bring up an email form that allows you to enter any email address that you would like to send the report to. You’ll notice the email report has 2 attachments. They cannot be opened until after you send the email. One attachment is a rendering of your plot envelope with your points. The other is the status of your Ramp, Takeoff, Landing, and Zero Fuel Weights and CGs.
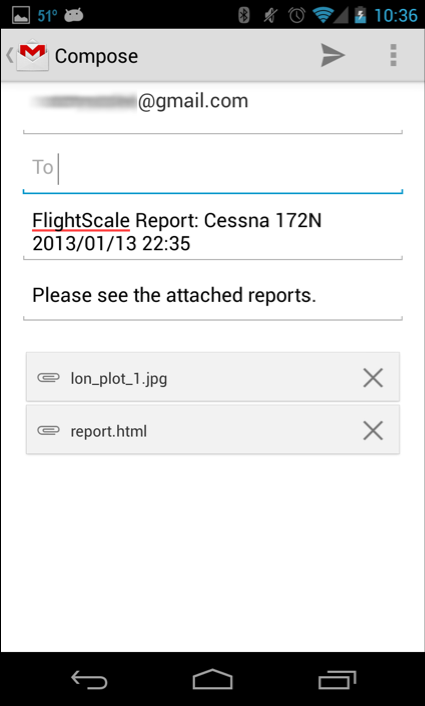
Email Report (v1.2.0)
Template Sharing and Importing
FlightScale now lets you share your template with friends and colleagues. You do this from the home screen where your list of templates are. You simply tap-and-hold on a template you would like to share, and tap the “Share Template” option.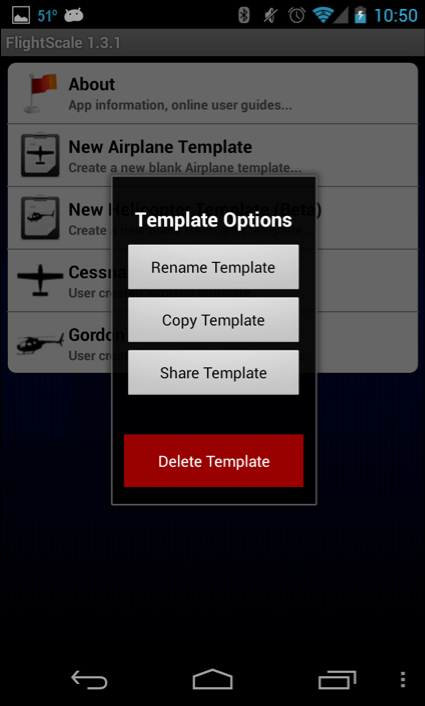
File Options (v1.3.1)
This will attach the template to an email that you can then send to someone. That person can then install the template file by tapping on it in the email and loading it with FlightScale on their device, or downloading it and opening it from their file system.
When the template file is opened with FlightScale, you’ll get a Template Import screen where you’ll be able to choose a name to import the template as. Once complete, you’ll be taken to the home screen with your new template ready to use.
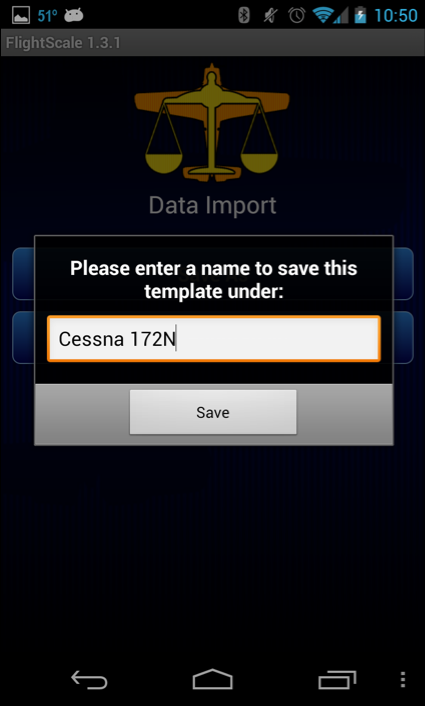
Template Import (v1.3.1)