

FlightLog User Guide

Welcome to the FlightLog User Guide. This document will help you get started using FlightLog! Just breeze through from start to finish so you have a general idea how to use the different features in FlightLog before you get started.
Please Note: This guide has screenshots for the iPhone version of FlightLog. I am planning on getting the guide updated this week with the iPad version’s screenshots, but in the meantime just remember that functionally the interaction / behavior is the same between the two apps even though presentation may be slightly different. If you have any specific questions please contact me.
Sections:
1 - The Home Screen!2 - Legacy Time
3 - Creating an “Aircraft”
4 - Creating Log Entries
4.1 - Favorites
4.2 - Block Times
4.3 - Hiding Registrations & Crew Members
5 - The Query Builder
6 - Generating Reports
7 - Backup and Recover Data with Dropbox
8 - Accessing an older version of a Backup
Section 1 - The Home Screen!
When you first start FlightLog you will see the “Home” screen similar to the one shown below. This is what FlightLog will look like without any data. FlightLogHD will allow you to use it in any orientation so go ahead and strap it to your airplane any way you can fit it. Most screenshots in this guide, however, will show as if the iPad is in landscape layout. This is how I intended it to be used most of the time because it allows for the quickest access to the left options as well as the main portion of the screen. If you are a current user of FlightLog on your iPhone or iPod and want to import your data, please go to Section 7 - Backup and Recover Data with Dropbox. 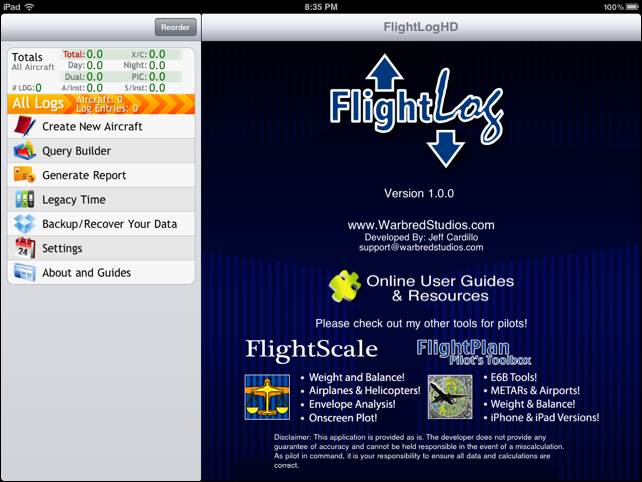
Section 2 - Legacy Time
The Legacy Time screen allows quick entry of bulk time previously earned. It is very important to note, however, that Legacy Time presents a limitation to the Query Builder and it may be desired not to utilize the Legacy Time entry screen.
The Query Builder is a powerful tool for analyzing flight time but it relies on the correlation between flight hours with each other. When a bulk entry screen is used, like the Legacy Time entry screen, the query builder cannot utilize the complex relationship between flight time to do analysis.
For example, hours entered as single log entries retain the hours association with each other, so you are easily able to create a Query Builder query to show you “all my time flying as a pilot in command, at night, in the passed 3 months”. Hours entered in bulk cannot be analyzed in this way.
Legacy Time will be show when total hours are being displayed, such as after tapping the top row of the home screen or generating a report without any Query Builder filter options. Once filter options are used in the Query Builder the Legacy Time will not be added by default. You can select to have the Legacy Time appended to your Query Builder results if you wish.
Section 3 - Creating an “Aircraft”
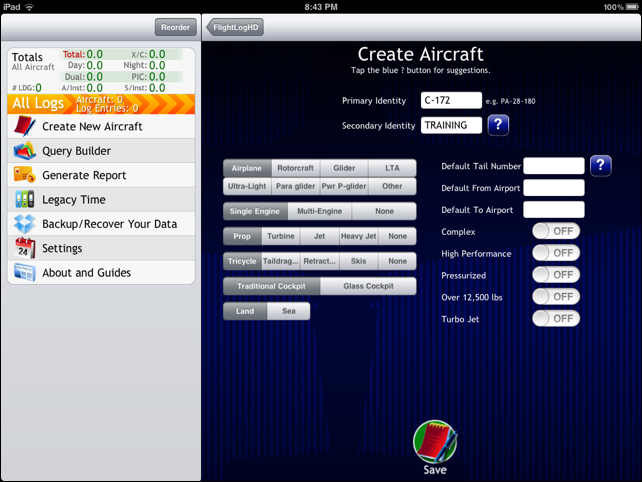
To start creating log entries we need to create an “Aircraft”. Aircraft in FlightLog do not have to represent a single aircraft; it can represent a collection of aircraft that share similar properties. In the example below I created an entry titled “C-172”. I decided to do this because I often use Cessna 172’s for training and want to keep all of my flight time together even though I often fly aircraft with different tail numbers.
By using an “Aircraft” in FlightLog to group log entries together you will be able to get “Aircraft” related statistics for your logs.
Please note that the bottom portion of the Aircraft creation screen has some options available. For example, you can specify a default tail number if you typically fly the same aircraft every time you create a new log entry for this group. When a new log entry is created, the tail number will automatically be filled in.
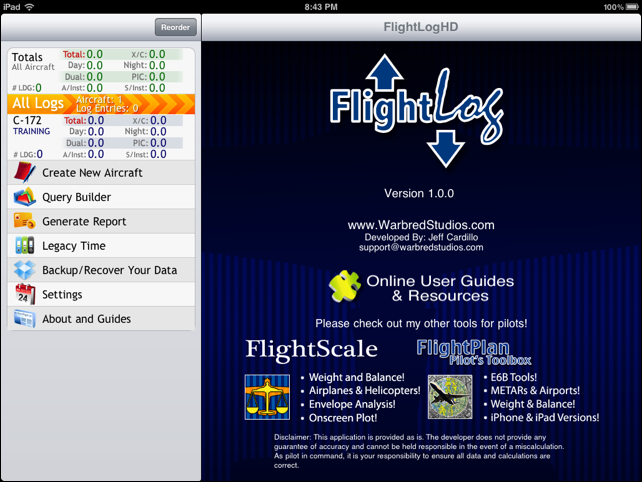
Once we tap the “Save” icon on the bottom of the screen we will be taken back to the home screen. The home screen with our newly created aircraft will look similar to the screenshot below.
Section 4 - Creating Log Entries
Now we have our aircraft set up, let’s add some log time to it. Tap on the aircraft entry you just created, in my case the C-172 entry. Now tap “Add New Log Entry”. This is the typical entry screen for your log. The top portion has some typical fields available and the bottom portion has a scrollable list of many more fields. Note that the top portion of the iPad version allows you to enter the log date in either text (right) or with the date picker (left). Changing either date control will automatically update the other to reflect the change.
Fill in some time, and tap the “Note” button if you want to enter a note. Here is what my screen looks like:
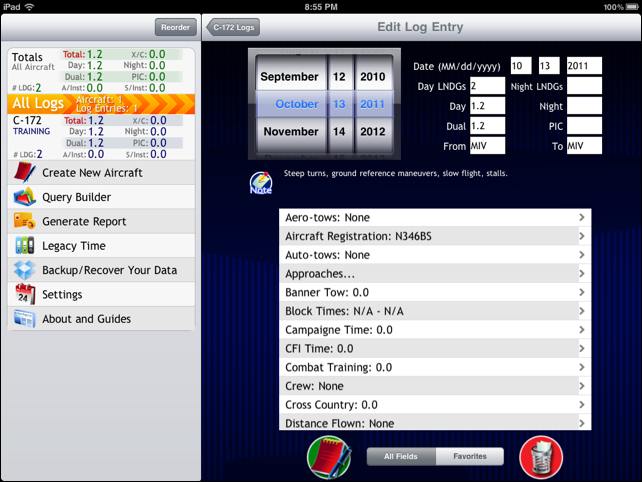
Tap the “Save” button on the bottom left of the screen and you will be taken back to your log listing for this “Aircraft”. I have entered two logs in and this is what my logs screen looks like:

On the very top-left of the home screen you see a “Totals” entry. This is an accumulation of totals across all of your aircraft. Since we only have one aircraft added these numbers will match the numbers from our entry we just created. You can tap on the “Totals” cell and you will be taken to a page that shows you totals for the many fields available in FlightLog.
Below the “Totals” cell there is an “All Logs” cell. This tells you basic information, such as how many aircraft and how many logs you have entered. Tapping this cell will bring you to a screen that shows you all of your logs merged together, sorted by date. This means that if you have multiple aircraft, all of your logs for all aircraft will be listed together here.
Section 4.1 - Favorites
There are many options for fields in FlightLog, most of which most users won’t need for their typical flight. FlightLog allows you to mark fields that you use often as a “Favorite” so it will appear under your “Favorites” menu and will be easy to access quickly.
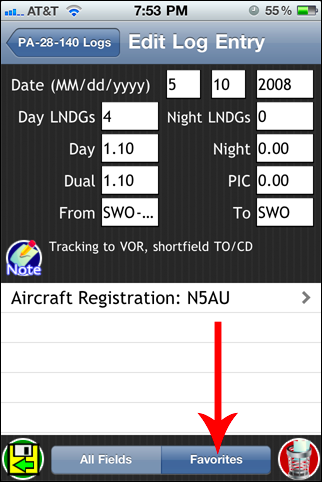
When you are in an advanced field entry screen, on the lower right you will see a switch labeled “Favorite”. Flip this switch to on and this field will be available under the Favorites menu on the Log Entry screen.
Section 4.2 - Block Times
If you only want to use block times to track your total time, FlightLog will let you do this. There is a setting on the Settings screen that you can change called “Auto-Calc Total Time”. With this setting your total time for you entry will be the difference between your “Out” and “In” time.
It is important to note that if you enter time in either “Day” or “Night” time that is different from the “Total Time” calculated by your Block Times fields, then the difference of your Block Time and what you’ve entered will be placed in the “Day” or “Night” field that is still blank. For example, if your Block Time total is 2.7 hours, and you enter 1.2 hours in for Day time, then 2.7 - 1.2 = 1.5 hours will be placed in your Night time. Similarly, Day time will be auto filled with the difference of Block Time and Night time if you fill in Night time that is less than your block time (and Day time is blank).
Section 4.3 - Hiding Registrations & Crew Members
FlightLog builds a list of your entered Registrations and Crew Members from your log data every time it loads. This allows FlightLog to present you with a list of only values that you are actively using in your log entries.
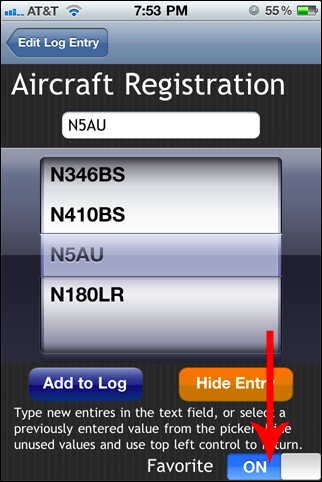
There may be a time when you want to hide a value so it does not show up in the Registrations or Crew Members list, such as if you no longer fly an aircraft that has a Registration number entered on an old log entry. To accomplish this, when you are on the Registration or Crew Member selection screen, just select the entry you would like hidden and tap the “Hide Entry” button. This will make it so FlightLog will not show this value in the selection screen anymore, but will maintain the value on the logs that have the value set.
If you want to bring a hidden value back to be shown in the selection menus again, just type in the value and add it to a log entry. Or, open up the old log entry for editing, open the Registration (or Crew Members screen) so that the value show in the entry field, and tap “Add to Log”. Adding a hidden value to a log will make it show up in the selection screens again.
Section 5 - The Query Builder
The Query Builder is a tool to help you analyze your flight time. It will help you find exactly how many hours you have doing something very specific, or very general, it is up to you! A simple query would be to find out how much time you have flown in the past 6 months. A more complicated query would be to find out how much time you have flown in the past 6 months, greater than 50 miles, at night, as pilot-in-command, and in a sea plane. Both of these queries are just a couple taps away!
Creating a query is pretty simple. Start by tapping the "Query Builder" item on the home screen. This will take you to the Query Builder screen where you can select filters to add to your query. On the bottom of this screen there is a text readout that will describe the query you have built. By default, if no filters have been selected, then everything will be shown if you tap "Run Query" (the bottom query item). “Run Query” will show a screen similar to the “Totals” screen accessible from the Home screen. Email Report will create an email report and show only the logs that pass your query parameters.
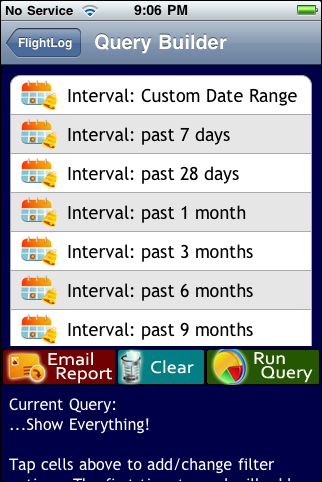
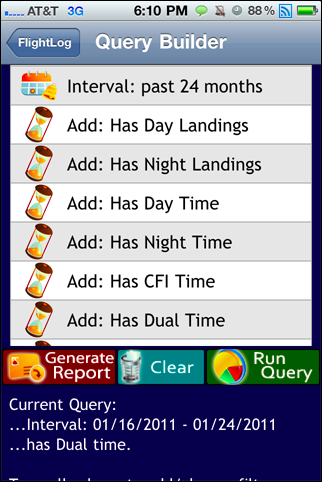
The first set of filters are time intervals back from today, and show a calendar icon. The next set of filters are log specific items, like pilot-in-command, night/day time, cross-country time, etc, and these have an hourglass icon. The third grouping are aircraft specific filters, such as aircraft type/engine type etc, and these have an airplane icon. On the bottom of the filters list you'll find a "Clear all filters..." that will remove all filters you have added so far, and a "Run Query" item that will execute the current query.
As you tap filters you'll see the "Current Query" text change on the bottom to show the filters you have added. If you add a filter by accident or change your mind, simply tap it again and it will be removed from your current filters.
As a simple example, tap the "Interval: past 7 days” in the first group, and “Add: Has Dual Time” in the second group. Notice that in the "Current Query" text on the bottom it shows the date interval that will be filtered, and also states that only records that have day time logged will be shown as well.
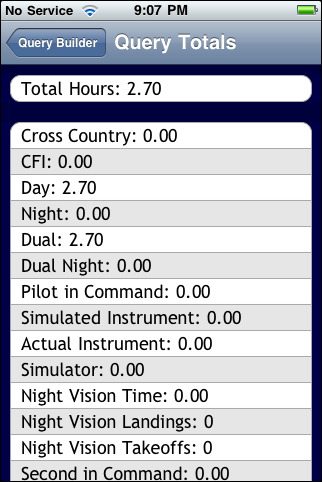
That is all there is to building a query! Just tap out the filters you want to add and then tap run! You'll then be taken to a "Query Totals" screen that will tell you the totals from your logs based on the filters you have selected. For more information on “Generate Report” please read the section of this guide dedicated to that feature.
Note 1: You may notice that if you do a time interval filter, it actually shows tomorrows date as the end date. The reason for this is because FlightLog essentially takes the start of tomorrow as the end date, a time of 0:00 in the morning.
Note 2: Be careful about adding mutually exclusive filters, such as specifying your query to show you records for a land and sea airplane, because each filter has an "AND" relationship, so you will end up with 0 results from such a query because a record can only belong to one aircraft, and an aircraft can only be land or sea, not both.
Section 6 - Generating Reports
The Report Generation tool allows you to send a human readable report either to your Dropbox or to your email account. These logs are well formatted for printing if you would like to make hard copies of them also.
As of FlightLog Version 1.3, the Generate Report tool has been integrated with the Query Builder tool to allow you to email yourself reports of your custom queries! To use this feature, create a query in the query builder as usual, but instead of choosing the "Run Query" option, tap the “Generate Report” option at the bottom of the query builder items.
To get started with the Generate Report Report tool, tap “Generate Report" from the Home screen. You will see a screen similar to the one shown below. This screen allows you to define how you want your report to look, which order you want your fields to show in, and what fields you want to show.
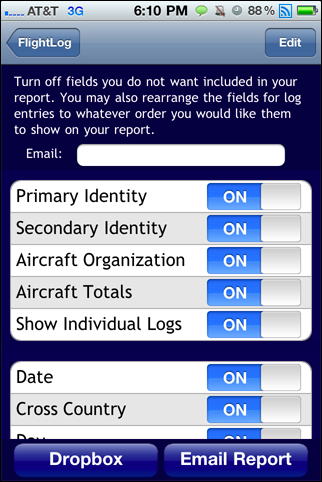
The first step is to enter your e-mail address in the E-mail field shown on the screen. The email address used to send a report will be saved and automatically placed there for the next time you want to send a report.
Next, you see a series of switches grouped into 3 blocks. The first block is for your Aircraft Category information, the second is for your log entry information, and the third is for visual options on your report. You can tap any switches for information you wish to turn off and it won’t show up in your report. All of your selections as to which fields you want to show or not will be saved so that next time they are just how you left them.
“Aircraft Organization” will split up your flight time among the aircraft categories you have your logs under in FlightLog. If you turn off this option then you should see one list of logs merged together.
“Aircraft Totals” shows a box at the top of the report showing totals for the different types of aircraft.
“Show Individual Logs” can be turned off if you are only interested in totals and do not want each log listed in the report.
You can also tap the Edit button in the upper right corner of the screen, and then re-order any of the log entry fields (2nd group) so that they show up in whatever order you want. The order you choose will also be saved and used for subsequent reports.
The last group of switches allow you to change some of the visual features of the report. For example, you can turn off border on the report grid, and turn off cell column shading if you wish to.
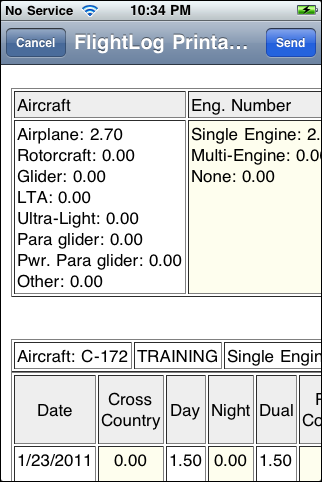
Tap "Generate Report Email" to see an example of what the report will look like. You are able to manually edit the report with text if you wish to. When you are satisfied, tap send and the report will be sent to you.
Section 7 - Backup and Recover data with Dropbox
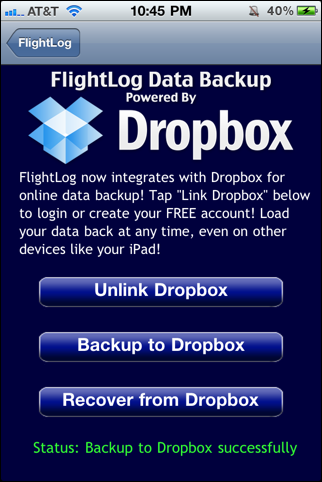
FlightLog now integrates with Dropbox to allow you to store your data in the “cloud”. “Cloud” is just a fancy name for the internet and means that your data is stored off of your device on a server somewhere else for safe keeping. FlightLog also allows you to recover that data at any time and even from other devices running FlightLog, such as your iPad!To get started with the Backup / Recover feature, tap on the “Backup / Recover Data” option from the home screen. You will be presented with a screen with basic instructions on it and 3 buttons. In order for FlightLog to be able to backup your data it needs to be linked to a Dropbox account. Dropbox accounts are free and are very useful for storing files from your computer etc, so you will likely find use for it outside of FlightLog.
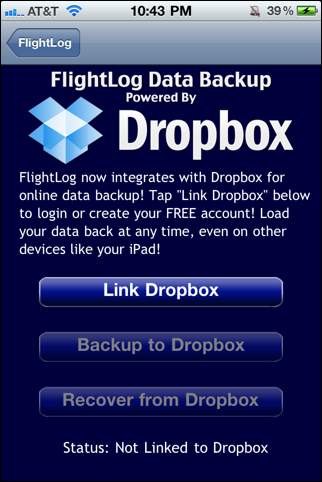
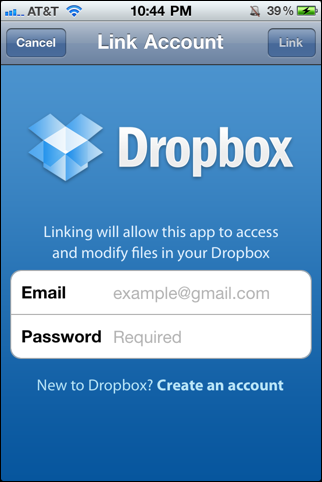
Tap the “Link Dropbox” button and you will be presented with a login screen. You can create an account from this screen if you do not already have one created, or create one from your computer here: Create Dropbox Account!
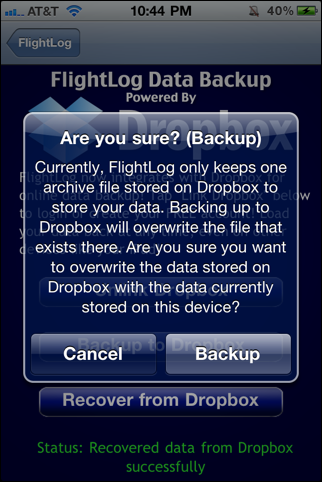
Once FlightLog has been successfully linked to Dropbox, the “Backup to Dropbox” and “Recover from Dropbox” button will be enabled. To backup your log data simply tap “Backup to Dropbox”. A confirmation dialog will be displayed asking you if you really want to upload the file because it will overwrite any existing backup currently on the server (but older versions will still be accessible by a computer-explained below). Tap “Backup” and you will see a screen show you that your data is being uploaded, and once complete you should see a message on the bottom of the screen state that the operation was “successful”.
Recovering data has a similar process. Recovering data will overwrite all of your log data currently on your device so be sure there isn’t anything on there you wouldn’t want to lose. Tapping “Recover from Dropbox” will remind you of this before it downloads data.
In order to keep the backup / recovery process as simple as possible, FlightLog will only maintain one archive file. This means the user does not need to name files or select files from the server, it is all automatic. FlightLog will only use the latest file uploaded to Dropbox to recover from, but it is important to note that Dropbox maintains a copy of the last 10 changes of a file for a free account (infinite changes on a paid account). The next section will explain how to restore an older backup.
Section 8 - Accessing an older version of a Backup
Dropbox’s free account will store the last 10 version of a changed file, including your FlightLog backup. If you accidentally upload data that has errors or want to get back to a previous state, log in to Dropbox from your computer. In the “root” of your file structure, you will see a folder named “FlightLog Backup”. Click in to that folder, and you will see a file named “flightlog_bak.xml”. Right click this file and select “Previous Versions” and you will see a file history similar to this:
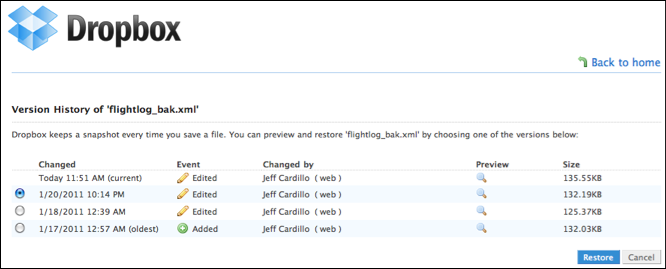
As you can see, restoring an older version of your data is as simple as selecting the date and clicking “Restore”. Also note that these files can be downloaded to your computer and stored.